
Painting your home is one of the most powerful ways to refresh your living space without breaking the bank. Whether you're looking to create a cozy bedroom retreat, energize your kitchen, or make a bold statement in your living room, home decorating painting offers endless possibilities for transformation. With the right approach, tools, and color choices, you can achieve professional-looking results that reflect your personal style and make your house feel like home.
Understanding Color Psychology in Your Painting Projects
Color selection forms the foundation of any successful home decorating painting project. The hues you choose don't just affect how a room looks-they influence how you feel when you're in that space.
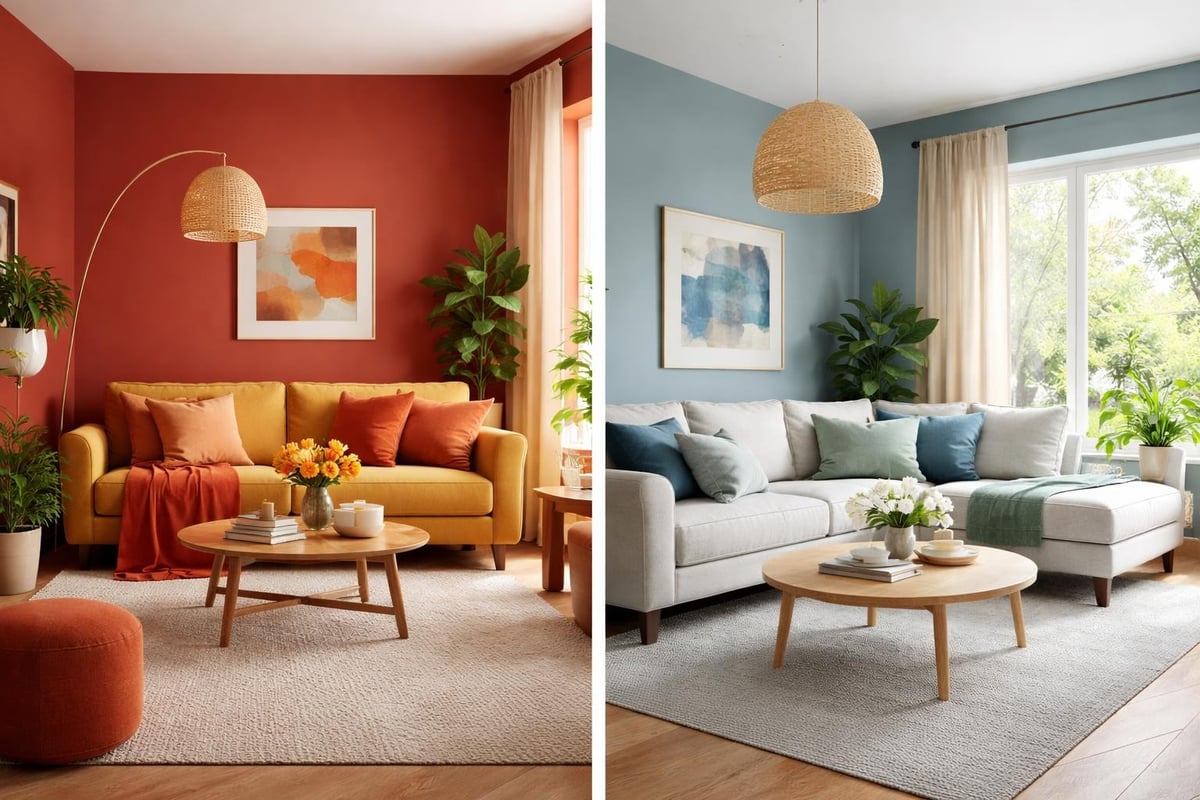
Warm colors like reds, oranges, and yellows create energy and stimulate conversation, making them excellent choices for social areas like dining rooms and kitchens. Cool tones such as blues, greens, and purples promote relaxation and calmness, which is why they're popular for bedrooms and bathrooms.
Creating Mood Through Strategic Color Choices
Neutral colors provide versatility and timelessness. Grays, beiges, and whites serve as perfect backdrops that allow your furniture and accessories to shine. Reese Witherspoon’s powder blue front door demonstrates how even a single painted element can create a welcoming atmosphere while symbolizing prosperity.
Consider these color applications for different rooms:
- Living rooms: Warm neutrals or soft blues for balance
- Bedrooms: Lavenders, soft greens, or warm grays for tranquility
- Kitchens: Yellows, light greens, or crisp whites for freshness
- Home offices: Blues or greens to enhance focus and productivity
The intensity of your chosen color matters just as much as the hue itself. Lighter shades make small rooms feel more spacious, while darker tones add drama and sophistication to larger areas.
The 60-30-10 Rule for Painting Success
Professional designers rely on proven formulas to achieve balanced, cohesive spaces. The 60-30-10 rule provides a simple framework for distributing color throughout your home decorating painting projects.
Here's how this principle works:
- 60% Dominant Color: Your wall color typically fills this role, creating the foundation of your room's palette
- 30% Secondary Color: Applied through larger furniture pieces, curtains, or an accent wall
- 10% Accent Color: Reserved for accessories, artwork, and decorative elements
This distribution creates visual harmony without overwhelming the senses. When planning your home decorating painting strategy, think about how your wall colors will interact with existing or planned furniture and décor.
Applying the Rule to Different Spaces
| Room Type | 60% (Walls) | 30% (Secondary) | 10% (Accent) |
|---|---|---|---|
| Living Room | Warm beige | Sofa and curtains in sage green | Throw pillows in coral |
| Bedroom | Soft gray | Bedding and rug in navy blue | Lampshades and art in gold |
| Kitchen | Crisp white | Cabinets in light wood tone | Hardware and décor in black |
This systematic approach takes the guesswork out of color coordination and ensures your painting efforts enhance rather than clash with your overall design vision.
Essential Preparation Techniques for Flawless Results
The difference between amateur and professional-looking home decorating painting comes down to preparation. Skipping these crucial steps leads to peeling, uneven coverage, and frustration.
Start by thoroughly cleaning your walls to remove dust, grease, and grime. A simple solution of warm water and mild detergent works for most surfaces. Allow walls to dry completely before proceeding.
Wall Repair and Priming
Fill holes, cracks, and dents with spackling compound, letting it dry according to manufacturer instructions. Sand repaired areas smooth, then wipe away dust with a damp cloth.
Priming serves multiple purposes in home decorating painting:
- Seals porous surfaces for even paint absorption
- Covers dark colors when switching to lighter shades
- Enhances paint adhesion for longer-lasting results
- Reduces the number of finish coats needed
Understanding interior design principles helps you see how proper preparation supports the broader goal of creating balanced, harmonious spaces.
Pro tip: Use painter's tape to protect trim, ceilings, and adjacent walls. Press the tape edges firmly to prevent paint bleed, and remove it while the final coat is still slightly damp for clean lines.
Avoiding Common Painting Mistakes
Even experienced DIY enthusiasts encounter challenges with home decorating painting projects. Learning from common mistakes saves time, money, and frustration.
Seven painting mistakes to avoid include rushing through preparation, using low-quality tools, and applying paint in poor lighting conditions. Each of these errors compromises your final results.
Picture Framing and Edge Issues
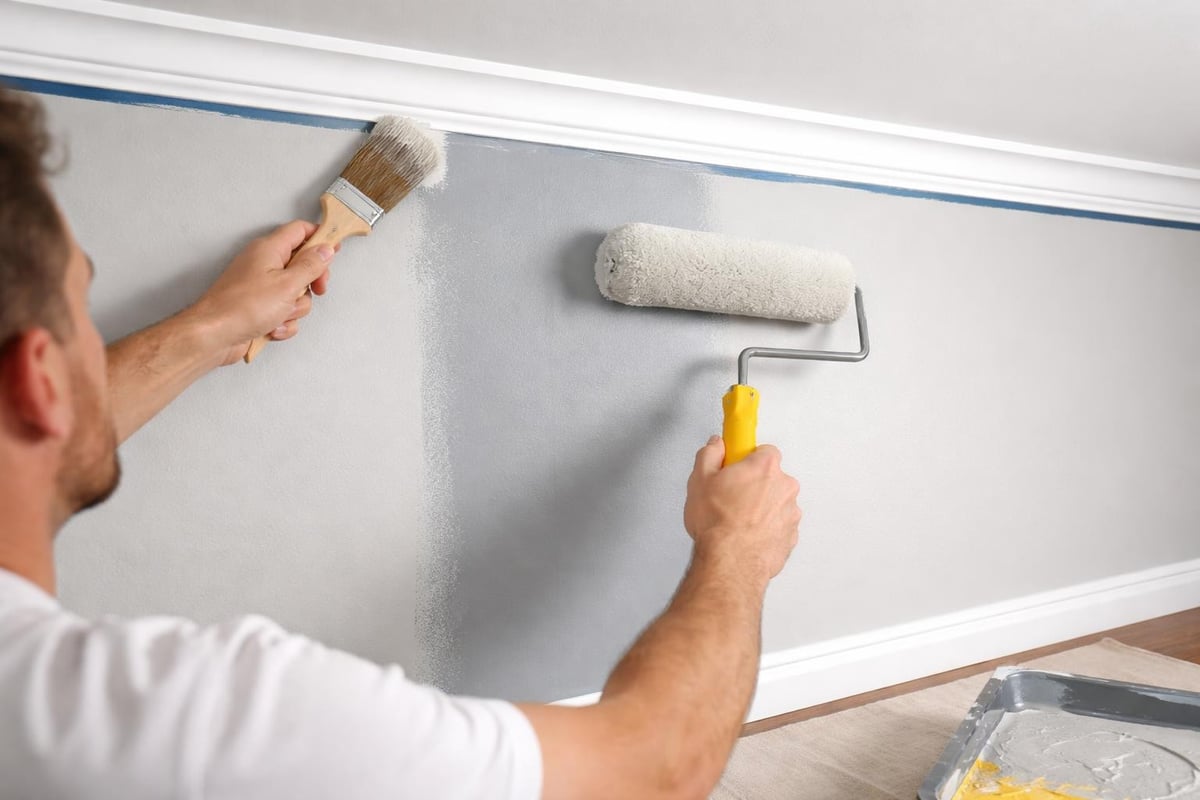
One particularly frustrating problem is "picture framing," where wall edges appear darker than the center. This occurs when you cut in around trim and corners, then wait too long before rolling the main wall area. The cut-in paint dries to a different sheen than the rolled sections.
Avoiding picture framing when painting requires working in manageable sections. Cut in a small area, then immediately roll that section before moving to the next. This wet-edge technique ensures uniform appearance across the entire wall.
Other mistakes to watch for:
- Overloading your brush or roller with paint
- Painting in extreme temperatures or humidity
- Skipping the second coat to save time
- Using expired or improperly stored paint
Choosing the Right Paint Finish
Sheen selection significantly impacts both appearance and practicality in home decorating painting. Each finish serves specific purposes and performs differently depending on the room and surface.
| Finish Type | Light Reflection | Best Uses | Maintenance |
|---|---|---|---|
| Flat/Matte | Minimal | Low-traffic areas, ceilings | Touch-ups blend easily |
| Eggshell | Slight | Bedrooms, dining rooms | Gentle cleaning |
| Satin | Moderate | Kitchens, bathrooms, hallways | Wipe-clean surface |
| Semi-Gloss | High | Trim, doors, cabinets | Highly durable |
| Gloss | Maximum | Accent details, furniture | Most washable |
Higher-sheen paints resist moisture and stains better, making them ideal for high-traffic or humid areas. However, they also highlight wall imperfections more readily than flat finishes.
Coordinating Finishes Throughout Your Home
Create visual flow by using consistent finish levels for similar surfaces throughout your home. Paint all your trim in semi-gloss, for example, while varying wall colors room to room. This approach maintains cohesion even as you explore different color palettes.
For families with young children, satin or semi-gloss finishes on walls simplify cleanup of fingerprints and smudges. The slight sheen doesn't sacrifice style while adding practical benefits.
Tools and Materials That Make a Difference
Quality tools transform home decorating painting from a chore into an enjoyable creative process. While premium supplies cost more upfront, they deliver better results and actually save money by reducing waste and the need for touch-ups.
Essential Painting Toolkit
Invest in these key items for professional results:
- Premium brushes: Angled sash brushes for cutting in, 2-3 inch brushes for trim
- Quality rollers: Different nap lengths for various textures (3/8" for smooth walls, 1/2" for light texture)
- Paint tray with liners: Disposable liners speed cleanup
- Extension pole: Reach ceilings and high walls without ladders
- Drop cloths: Canvas or heavy plastic to protect floors and furniture
Professional interior painting tips emphasize that investing in proper equipment pays dividends through easier application and superior finish quality.
Don't forget safety equipment like respirator masks for VOC protection, especially when working in poorly ventilated spaces. Safety glasses protect your eyes from drips and splatters.
Strategic Planning for Multi-Room Projects
Tackling home decorating painting across multiple rooms requires thoughtful planning to maintain momentum without becoming overwhelmed. Breaking large projects into manageable phases keeps you motivated and allows life to continue during renovation.
Start with a priority list based on which rooms need attention most urgently or which will provide the biggest visual impact. Living rooms and entryways often top this list since they're spaces you and guests experience most frequently.
Room-by-Room Sequencing
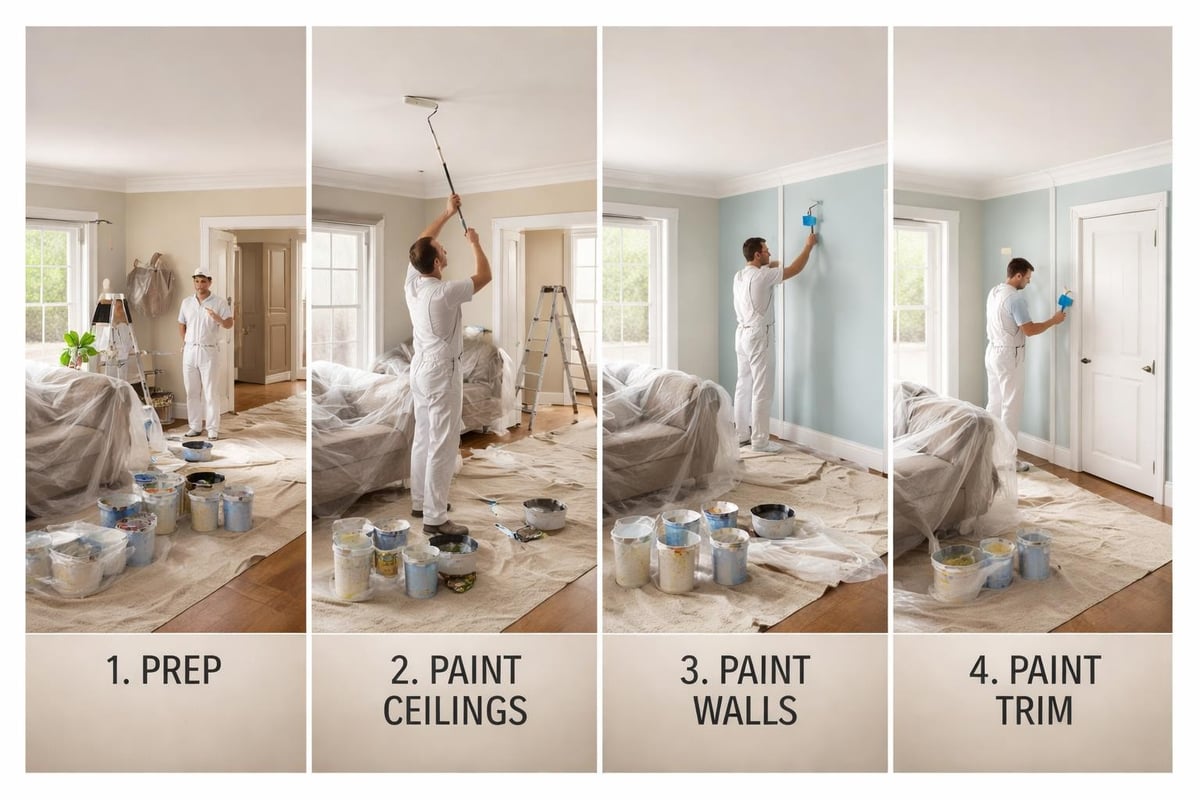
- Prepare all rooms simultaneously: Fill holes, clean walls, and apply primer in every space
- Paint ceilings first: Work from top to bottom to avoid spattering finished walls
- Complete one room fully: Finish walls, trim, and cleanup before moving to the next space
- Allow proper drying time: Don't rush furniture replacement or hanging artwork
This methodical approach prevents the chaos of having your entire home in disarray while ensuring each completed room provides a sense of accomplishment. If you're exploring house decoration ideas, coordinate your painting timeline with other décor updates for maximum impact.
Special Considerations and Surfaces to Avoid
Not every surface in your home benefits from a fresh coat of paint. Some items should never be painted due to safety concerns, functionality issues, or potential damage to home value.
Things you should never paint in your home include smoke detectors, electrical outlets, window mechanisms, and appliances. Painting these items can create fire hazards, interfere with proper operation, or void warranties.
Surfaces Requiring Special Techniques
Certain surfaces need specialized approaches for successful home decorating painting:
Textured walls: Use thicker nap rollers and apply paint in multiple thin coats rather than one heavy application. Work paint into crevices with a stippling motion.
Previously wallpapered surfaces: Remove all wallpaper and adhesive residue before painting. Sand smooth and prime with stain-blocking primer to prevent patterns from bleeding through.
Brick and masonry: Clean thoroughly, allow to dry completely, and use masonry-specific primer and paint. These surfaces absorb significant amounts of paint, so budget accordingly.
Wood paneling: Clean, lightly sand to create tooth for paint adhesion, fill grooves if desired, then prime with bonding primer before applying finish coats.
Creating Accent Walls and Feature Spaces
Accent walls add personality and visual interest without the commitment of painting an entire room in a bold color. This home decorating painting technique creates focal points that draw the eye and define spaces within open floor plans.
Choose the wall that naturally serves as the room's center of attention-typically the one behind a bed, sofa, or fireplace. Painting multiple accent walls dilutes their impact and creates visual confusion.
Color Selection for Maximum Impact
Your accent wall should complement, not clash with, your main wall color. Options include:
- A deeper shade of your existing color for subtle sophistication
- A bold contrasting hue for dramatic effect
- A coordinating color from your room's existing palette
- Trendy colors you love but might tire of quickly
Consider texture techniques like color washing, sponging, or stenciling to add dimension to your accent wall. These methods create custom looks that elevate your home decorating painting beyond basic solid colors.
For children's rooms, accent walls provide opportunities for fun themes that can easily be repainted as interests change. Creative approaches to decorating help you design spaces that grow with your family.
Maintaining Your Painted Surfaces
Proper maintenance extends the life of your home decorating painting efforts and keeps your rooms looking fresh for years. Different finishes and rooms require varying levels of care.
Regular dusting prevents buildup that becomes harder to remove over time. Use a microfiber cloth or vacuum with soft brush attachment to gently remove dust from walls every few months.
Cleaning Painted Walls Safely
| Finish Type | Cleaning Method | Frequency |
|---|---|---|
| Flat/Matte | Dry sponge or gentle spot cleaning only | As needed for marks |
| Eggshell | Damp cloth with mild soap | Monthly in high-traffic areas |
| Satin | Soft sponge with gentle cleaner | Weekly for kitchens/baths |
| Semi-Gloss/Gloss | All-purpose cleaner and soft cloth | Weekly or as needed |
Always test cleaning solutions in inconspicuous areas first. Harsh chemicals or abrasive scrubbing can damage paint, especially flat finishes.
Address scuffs and marks promptly-the longer they sit, the harder they become to remove. Keep small amounts of leftover paint for touch-ups, stored properly in airtight containers with labels indicating the room and date of application.
Seasonal Timing for Painting Projects
Weather and temperature significantly affect home decorating painting success. Indoor humidity, outdoor conditions if painting exteriors, and ventilation all play crucial roles.
Spring and fall offer ideal conditions in most climates. Moderate temperatures allow paint to cure properly without the extreme heat of summer or cold of winter. You can open windows for ventilation without significantly impacting indoor comfort.
Weather Considerations by Season
Summer painting: Work early mornings or evenings to avoid peak heat. High temperatures cause paint to dry too quickly, leading to visible brush marks and poor leveling.
Winter painting: Maintain indoor temperatures above 50°F during application and drying. Cold temperatures prevent proper curing and can cause paint failure.
Humidity factors: Ideal humidity ranges between 40-70%. Excessive moisture prevents proper drying and can cause mildew growth under fresh paint.
Plan your home decorating painting projects around your schedule and climate conditions for the best possible outcomes. Foolproof decorating tips include timing renovations when you can properly ventilate and maintain ideal conditions.
Eco-Friendly and Low-VOC Paint Options
Modern home decorating painting increasingly emphasizes health and environmental responsibility. Low-VOC (volatile organic compound) and zero-VOC paints minimize harmful emissions while delivering excellent performance.
Traditional paints release VOCs during application and drying, contributing to indoor air pollution and causing headaches, dizziness, and respiratory irritation in sensitive individuals. Newer formulations dramatically reduce these emissions without sacrificing coverage or durability.
Benefits of Green Paint Choices
Eco-friendly paints offer multiple advantages:
- Safer for families with young children, elderly members, or those with respiratory conditions
- Reduced environmental impact during manufacturing and disposal
- Minimal odor during application and drying
- Faster reoccupation of painted rooms
- Comparable or superior performance to traditional paints
Many major paint brands now offer comprehensive low-VOC and zero-VOC lines across all finish types and thousands of colors. These options cost slightly more than conventional paints but provide peace of mind and healthier indoor air quality.
Look for certifications from organizations like GREENGUARD or Green Seal when selecting eco-friendly paints. These third-party verifications ensure products meet strict chemical emission standards.
Painting Techniques for Textured Effects
Beyond solid colors, home decorating painting includes decorative techniques that add depth, interest, and personality to your walls. These methods transform ordinary rooms into unique spaces that reflect your creative vision.
Sponging: Dab a natural sea sponge loaded with glaze or diluted paint over a base coat to create soft, mottled effects. This technique works beautifully in bathrooms and adds warmth to neutral color schemes.
Rag rolling: Roll twisted fabric across wet glaze to create elegant, fabric-like textures. This classic technique suits formal dining rooms and master bedrooms.
Color washing: Apply translucent glaze in random, overlapping strokes for a soft, weathered appearance that adds depth while maintaining lightness.
Specialty Finishes and Their Applications
More advanced techniques include:
- Striping: Create visual interest with horizontal or vertical stripes in coordinating colors
- Stenciling: Add patterns, borders, or motifs without artistic skills
- Ombré: Gradually blend colors from dark to light for dramatic, contemporary looks
- Metallic accents: Incorporate gold, silver, or copper paints for glamorous touches
Practice these techniques on poster board before committing to walls. The learning curve varies, but most decorative painting methods become manageable with basic practice and patience.
Home decorating painting represents one of the most accessible and impactful ways to transform your living spaces, combining creativity with practical improvement. Whether you're refreshing a single room or reimagining your entire home, the techniques and strategies we've explored help you achieve professional results while expressing your personal style. For more inspiration, practical guides, and creative solutions for all your decorating projects, Decoratehow provides the tips and hacks you need to create beautiful, functional spaces your whole family will love.