How to Make and Decorate an Easy Bunny Cake
If you’d like to make an adorable bunny cake for your child from baking and frosting the entire cake with buttercream or sugar frosting. Decorating the bunny face and the final touches. Here’s our tips on getting it right.

Baking and Cooling the Cakes
The first step in making a bunny-shaped cake is to bake two round cakes of the same size. You could buy two round sponge cakes and then decorate them if you are stuck for time.
Or you can conveniently use your favorite cake recipe or a boxed cake mix and stir together in a large bowl, then pouring into two round cake pans. I say this as I know from my own experience not all of us are great at baking! If you need an easy easter bunny cake recipe which can be used for any time of year we will include one below.
So should you cook them, once the cakes are baked, let them cool completely to room temperature on wire racks. It’s crucial to ensure the cakes are completely cool before cutting and assembling to prevent them from crumbling or breaking.
How Do You Cut A Cake Into A Bunny Shape?
To create a bunny-shaped cake, as we said above, start by baking two round cakes of the same size and allowing them to cool completely.
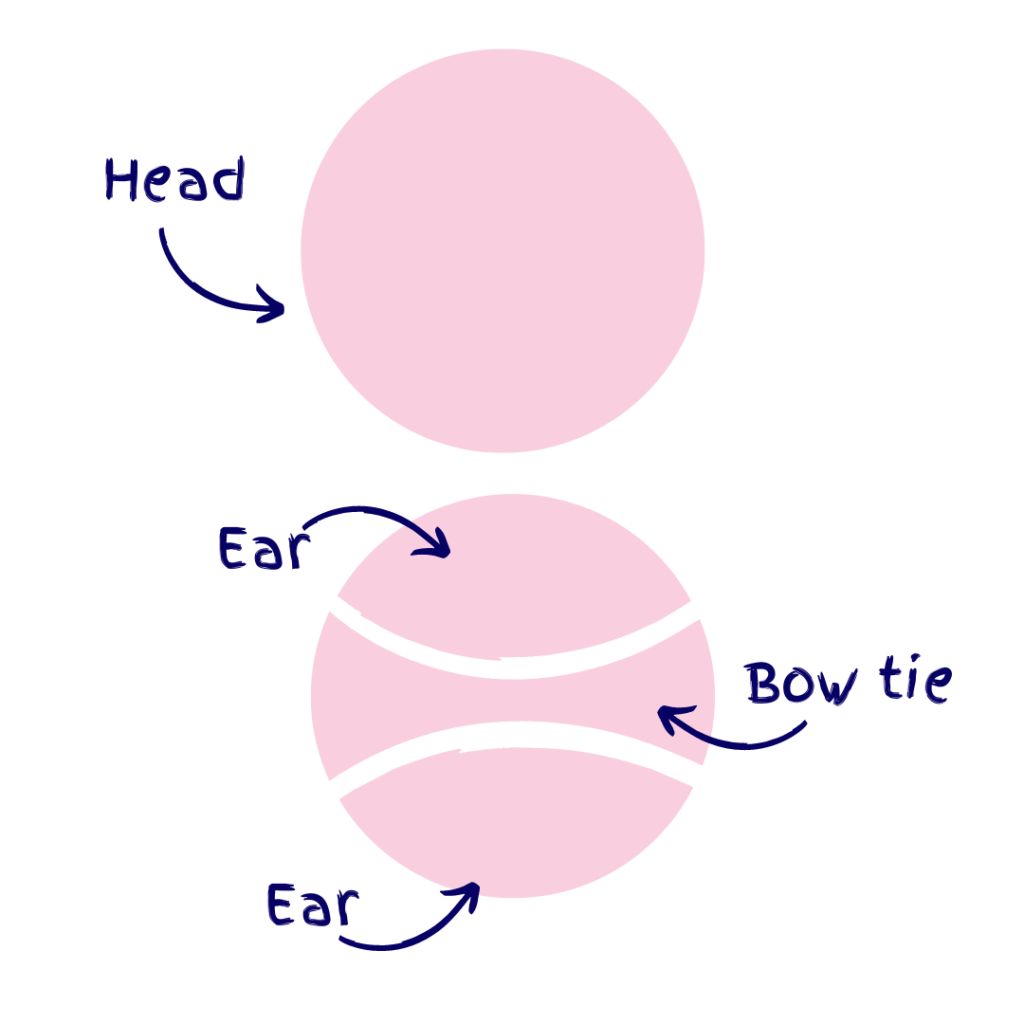
Creating the Bunny Ears Template, you’ll need a template to shape the cakes into bunny ears. Take a piece of parchment paper and draw the shape of a bunny’s ear using a pencil. You can use our diagram below to help you create the shapes. Carefully cut out the bunny ear parts from the parchment paper and then you’ll have your template.
Place the parchment paper ear template on one of the cakes and using a sharp knife, carefully cut around to remove the excess cake leaving behind the bunny ear shape. Repeat the process with the second cake to create the other bunny ear. Now, position the two earpieces on the other cake to form a bunny head and add the bowtie underneath.
Assembling and Decorating the Bunny Cake
Now that you have your bunny ear shapes, it’s time to assemble and decorate the cake. Position the two bunny ear pieces on top of the other cooled cake to form the bunny head shape.
To decorate the cake, begin by ensuring it is completely cooled and leveled. If it’s a layer cake, stack the layers and apply a crumb coat of frosting to create a smooth surface. Choose a sturdy and easy-to-work-with frosting like buttercream, ganache, or royal icing.
Decide on your desired design from simple, smooth frosting or intricate piping and decorations. With tools like cake scrapers, piping bags, it will make your job easier to add pretty details.
Choosing the Right Frosting
Selecting the right frosting is crucial for achieving your cake’s desired look and taste. Buttercream frosting is a popular choice due to its creamy texture and versatility. It’s easy to work with and can be tinted with food coloring to create a range of colors. Ganache, made from a mixture of chocolate and cream, offers a rich, glossy finish perfect for more decadent cakes. Royal icing, made from egg whites and powdered sugar, is ideal for intricate piping and delicate decorations.
Decide on the design and style of your cake before you begin decorating. If you prefer a simple and elegant look, opt for a smooth and even layer of frosting using a cake scraper or offset spatula. Use piping bags and decorating tips to create beautiful swirls, rosettes, or intricate patterns for a more elaborate design. You can add texture and dimension with edible flowers, sprinkles, or glitter.
Frost the cake with your favorite frosting, such as buttercream or cream cheese icing, covering the head, ears and bowtie. Use white frosting, or colored frosting to add facial features like eyes, a nose, and whiskers for a cute bunny cake. You can also use pink jelly beans for a nose, candies, sprinkles, or edible flowers to add additional details and make your bunny cake come to life. Consider adding a cute little bunny tail using fondant or frosting for an extra touch of charm.
Adding Final Touches
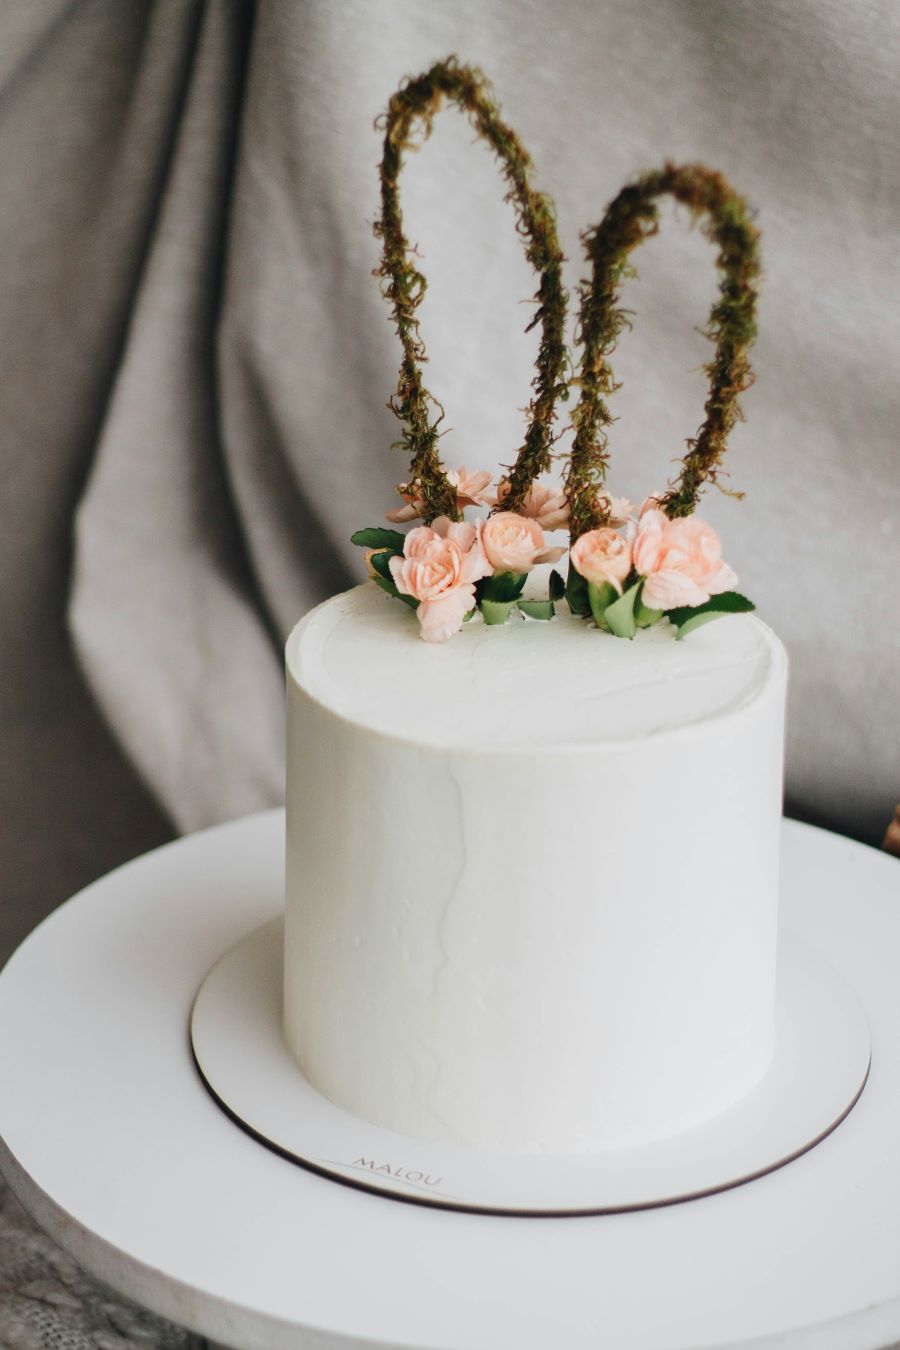
Once your cake is frosted and decorated according to your design, it’s time to add any final touches. Consider adding a personalized message using food gel pens, piped writing or edible lettering. Fresh flowers can add a touch of elegance and beauty to the cake, while edible decorations like chocolate curls or fruit slices can add a pop of color and flavor.
Adding the Fluffy Tail and Detailing
To give your bunny drawing more character, draw a fluffy tail at the back of the bunny’s body, shredded coconut is great for adding texture. The tail can be represented by a rounded shape with curved lines to create a fluffy texture.
For added detail and realism, you can now draw fur texture on the bunny’s body, adding small strokes or lines to give the bunny a soft and fluffy appearance. Add whiskers on each side of the nose to complete the facial features, and consider drawing a carrot in the bunny’s hand to add a playful touch.
FAQ’s
Best frosting for the top of the cake?
Buttercream frosting, cream cheese frosting, or fondant are commonly used for decorating bunny cakes. Buttercream allows for easy piping and smoothing, while fondant provides a smooth and polished finish for more intricate designs.
Can I use food coloring to tint the frosting for decorating?
Yes, you can use food coloring to tint the frosting and achieve various colors for decorating your bunny cake. Gel or paste food coloring is preferable, as it provides vibrant colors without thinning the frosting.
What are some ideas for decorating a bunny cake?
Decorate your bunny cake with edible eyes, a cute pink nose, and whiskers made from licorice strings or piped frosting. Use colorful sprinkles for the bunny’s fur or apply fondant cutouts for a whimsical touch. Add a decorative bow or a mini carrot made from frosting as a final touch.
How can I create a 3D effect for the bunny cake’s features?
To create a 3D effect, use piping bags with various tips to add dimension to the bunny’s ears, eyes, and nose. You can also add depth by using contrasting frosting colors for shading and highlighting.
Can I add edible elements like candies or fruits to the bunny cake decor?
Absolutely! You can add edible elements like candies for the bunny’s eyes, or use fresh fruits like strawberries or blueberries to create accents on the cake. Just make sure any edible decorations are securely attached to the cake. You could even make some bunny cupcakes and display the finished product on a large platter.
Do you have an original recipe for the two round sponge cakes?
Yes please find this reliable recipe to help you with the baking.
We hope you enjoy this great project which would be lovely to do as a surprise or with your child. Practice being a professional cake decorator together and making something you are both proud of. We doubt you will have any leftover cake afterwards! It may seem like a daunting task but with using your favorite cake mixes you can stick to the easy peasy part of making a fun cake. Just don’t eat all of the remaining frosting!